


If you’re building or remodeling a bathroom, one thing you can’t afford to overlook is the shower waterproofing membrane. It’s not the most glamorous part of the job, but it’s one of the most important. A good membrane keeps water where it belongs—on the surface—and out of your walls and floors. Skip this step, and you’re opening the door to mold, rot, and structural damage down the line. This guide breaks down the different types of membranes, how they work, where they go, and how to install them right the first time.
What Is a Shower Waterproofing Membrane?
In simple terms, a waterproofing membrane is a barrier that stops water from seeping into surfaces in wet areas like showers. Tile, grout, and cement board may be water-resistant, but they’re not waterproof. Water will eventually find its way through. A membrane creates a sealed layer between your tiles and the rest of your home’s structure, protecting everything underneath.
Types of Waterproofing Membranes
Sheet Membranes
Sheet membranes come in rolls or pre-cut panels and are typically made from durable synthetic materials. They’re installed with thin-set mortar or a specific adhesive and offer a consistent thickness that ensures reliable coverage.
What people like about them is the level of control—they go on in sections, so you can make sure each part is placed just right. They’re especially useful if you want a clean, predictable installation without worrying too much about thickness or drying time.
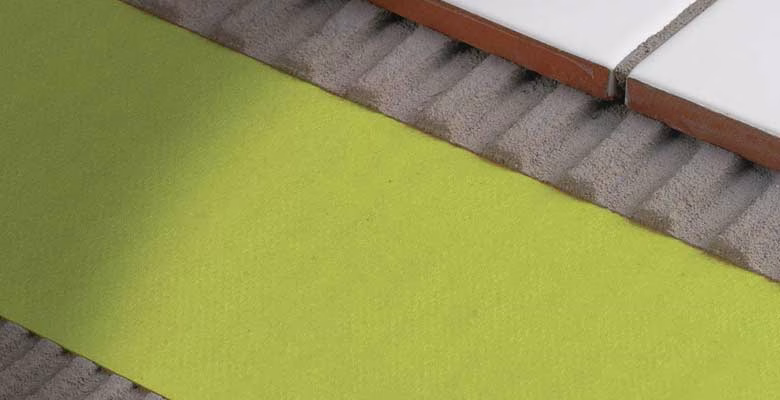
Liquid-Applied Membranes
These are painted, rolled, or sprayed directly onto surfaces, then left to cure. Once they dry, they form a flexible, rubbery layer that seals everything underneath.
They’re great for showers with unusual shapes or lots of corners, because they coat everything evenly. Since they form a continuous layer with no seams, there’s less chance of leaks—assuming you apply them properly and allow for full curing.
Foam Board Panels with Waterproof Coating
These are foam core panels with a waterproof layer already built in. They double as both a tile backer and a moisture barrier, which cuts down on steps during installation.
They’re lightweight, easy to cut, and ideal for modern shower systems. When sealed correctly at the joints, they offer excellent waterproofing with minimal hassle.
Cementitious Waterproofing Membranes
These are cement-based products that you mix and apply like plaster. Once dry, they form a hard, waterproof coating. They’re often used on concrete surfaces or masonry, and while they’re durable, they don’t have much flexibility.
That means they’re not always the best choice for areas that might shift or settle slightly over time, but they do hold up well in static environments.
Self-Adhering Membranes
These are peel-and-stick sheets that bond directly to clean, dry surfaces. They’re a bit like applying a giant waterproof sticker. There’s no waiting for curing or drying—once they’re on, you’re good to go.
Because they stick so well and mold to the surface underneath, they’re great for tight spaces and detailed work around plumbing.
Essential Areas That Need Waterproofing
Not every inch of a bathroom needs to be waterproofed, but in a shower, it’s critical to cover:
- Walls and floors inside the shower
- The shower curb
- Inside corners where walls meet
- Floor-to-wall transitions
- Around drains, valves, and niches
Any spot where water can pool or splash is a place you need to seal up.
What Makes a Good Membrane?
Strong Water Resistance
This is the baseline. If a membrane doesn’t stop water completely, it’s not doing its job. Always choose a product rated for full waterproofing, not just water resistance.
Crack Bridging
Some membranes can stretch or flex slightly if small cracks form in the substrate underneath. This ability helps maintain a waterproof barrier even when things shift a bit.
Vapor Control
In showers that double as steam rooms or in humid climates, some membranes also help block moisture vapor, not just liquid water. Look for products rated as vapor retarders if this is important in your setup.
Bonding and Compatibility
You want your membrane to stick well to the surface below and play nicely with tile adhesive above. Most are made to pair with thin-set mortar, but it’s still worth double-checking before you start.
Tools and Materials You’ll Need
Getting your waterproofing right depends on having the right tools on hand:
- Trowels or putty knives (depending on membrane type)
- Seam or corner tape
- Brushes or rollers (for liquid products)
- Thin-set mortar
- Sealant or caulk
- Utility knife and level
- Drain test kit (if flood testing)
Taking time to prep and having the right gear can mean the difference between a leak-free bathroom and a major repair down the line.
Installing a Waterproofing Membrane: Step by Step
Start with the Prep
Make sure your surfaces are clean, dry, and flat. Remove any debris, patch cracks, and fill voids. The membrane can’t do its job if it’s not well bonded to the surface.
For Sheet Membranes
Spread thin-set mortar on the wall or floor, then embed the membrane. Smooth it out to eliminate bubbles. Overlap edges where required and use seam tape for joints and corners.
For Liquid Membranes
Apply the first coat evenly, working it into corners and edges. Once that dries, apply a second coat in the opposite direction. Don’t rush this—thickness and drying time are key to success.
Seal the Gaps
Use tape, collars, or additional layers of membrane around drains, pipes, valves, and anywhere two surfaces meet. These are common leak points and need special attention.
Cure and Test
Let everything cure fully. If your system allows for it, flood test the area by plugging the drain and filling the shower base with water. After 24 hours, check for leaks before moving forward.
Why Membranes Beat Traditional Waterproofing
Compared to older methods like plastic liners or roll-on waterproof paints, modern membranes are more reliable. They’re designed specifically for tile installations and have better sealing, bonding, and durability.
Plus, they’re easier to work with and adapt better to the demands of today’s bathrooms—especially when it comes to things like walk-in showers or complex tile layouts.
Tiling Over the Membrane
Most modern membranes are designed to work seamlessly with polymer-modified thin-set mortar. Once the membrane is cured and tested, you can tile directly over it.
Avoid premixed adhesives unless your membrane specifically allows it. These don’t always offer the right bonding strength and could lead to tile failure later.
How Long Will a Membrane Last?
A properly installed membrane can last for decades—often as long as the tiles above it. The key is proper prep and installation. After that, just keep an eye on grout lines and caulk joints. If those fail, water can still sneak behind your tile.
Minor damage to a membrane can usually be patched, but larger issues may require redoing sections of the system.
Common Waterproofing Mistakes
- Skipping prep work
- Not applying the right thickness
- Leaving gaps at seams or corners
- Using incompatible adhesives
- Rushing the curing time
A little extra care during installation will save you a lot of trouble later.
New Trends and Tech in Waterproofing
Membrane technology has come a long way. Today’s products are more flexible, durable, and environmentally friendly than ever. Some even include built-in vapor control or come with pre-formed corners and pipe seals that simplify installation.
This makes waterproofing not just more reliable but also more accessible, even for DIYers.
Main Takeaways
- Every wet-area bathroom needs a shower waterproofing membrane—no exceptions
- There are several types to choose from: sheet, liquid, foam panels, cement-based, and peel-and-stick
- Proper prep, application, and sealing are what make a system work
- Testing your waterproofing before tiling is always a smart move
- With care, a good membrane will last the life of your bathroom
Frequently Asked Questions
Can all membranes be tiled over with thin-set mortar?
Yes, most modern membranes are made for it, but always check the product details to be sure.
Can I apply a membrane to a painted wall?
Not recommended. You’ll need to strip the paint first or start with a suitable backer board.
How long should I wait before tiling over a liquid membrane?
Usually 12 to 24 hours, depending on the product and environment. Don’t rush it.
Do I need a membrane in upstairs bathrooms?
Absolutely. Leaks upstairs can cause twice the damage—water gets into the floor and the ceiling below.
Is cement board waterproof?
No. Cement board is water-resistant, not waterproof. You still need a membrane over it.


